Visualizations
This guide walks you through the full workflow for creating and rendering NBA shot chart visualizations using the Sportradar OnAir platform.
1. Set Password
Once you receive an email with a temporary password go to onair.sportradar.com
Enter your email address (case sensitive) and the temporary password you received. Make sure to not include
the comma listed after the password.
You will then be prompted to set a permanent password you will use to login moving forward.
2. Create an NBA Profile
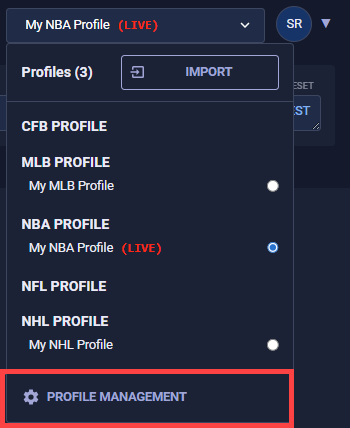
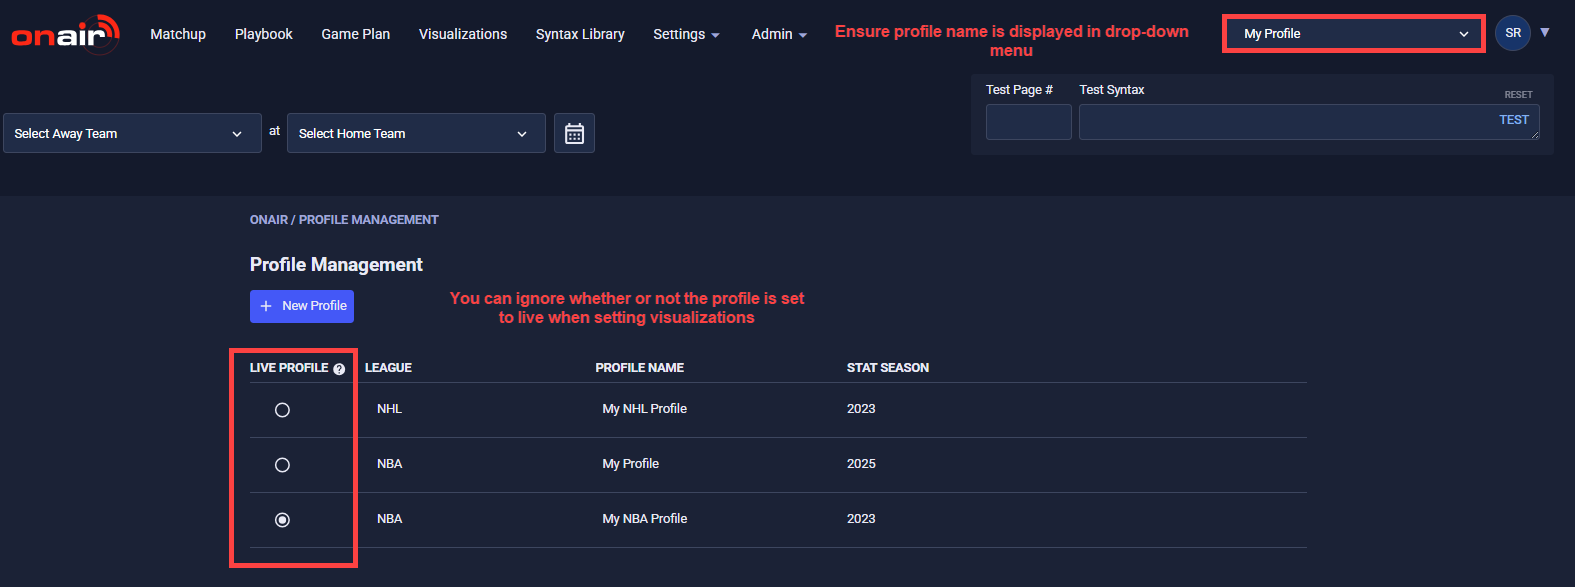
Click on the large dropdown menu in the upper right and select Profile Management.
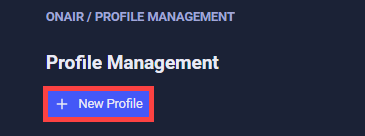
In Profile Management, click the New Profile button.
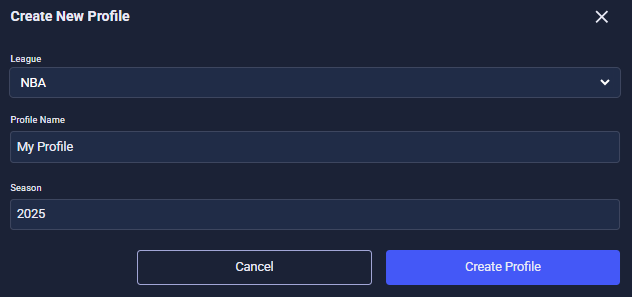
- Select NBA as the league
- Assign a custom name to the profile
- Set the stat season to the current season
- Click Create Profile.
Note: This setup only needs to be done once.
Once your new profile is created, select it from the dropdown if it’s not already active. You should see its name displayed at the top. For the Visualizations product, you can ignore the “LIVE” status and the radio buttons next to the profile name.
3. Select a Matchup
Go to the Visualizations tab at the top of the screen. Then, click the Select Game button.

The calendar displays.
Select your matchup by picking a date and choosing from the available games.
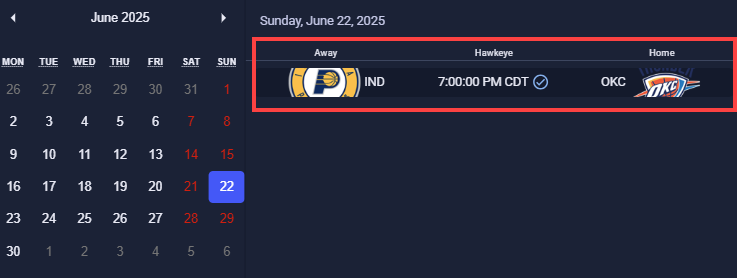
Available MatchupsHawkeye tracking data is only available for games played within the past seven days. Matchups outside this window cannot be selected.
Available matchups are marked with a checkmark, while unavailable ones are still visible but marked with an “X”.

4. Select a Court, Team, Player, Jersey, and Camera
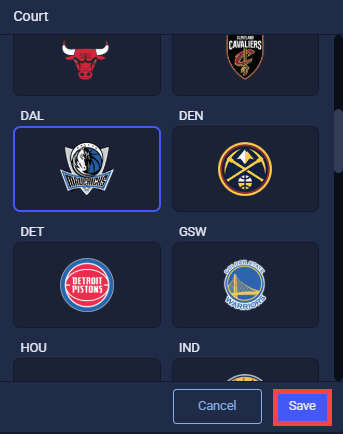
After selecting a matchup, click Court. The Court menu displays court options for each team, along with two generic designs.
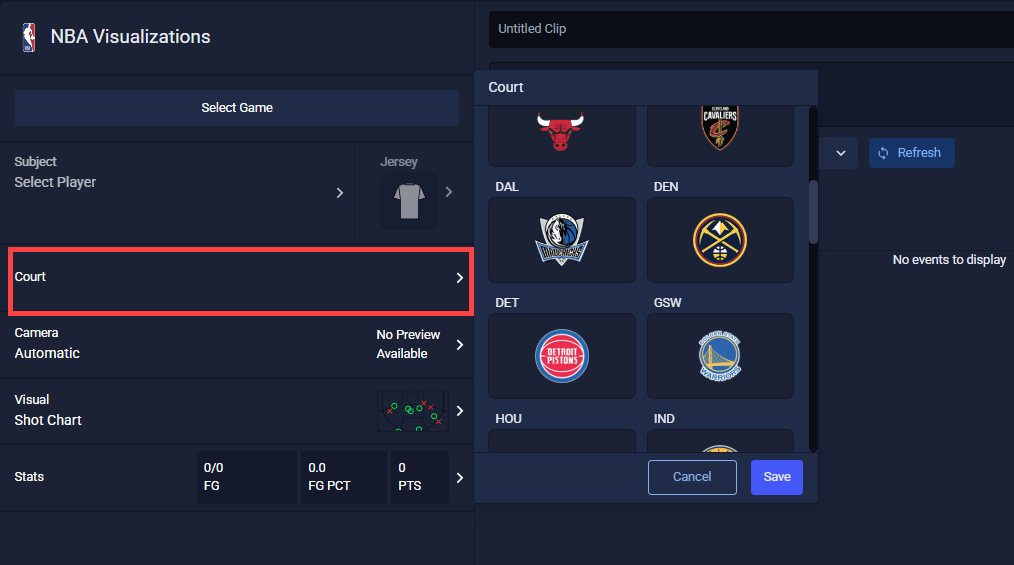
Choose your preferred court and click Save.
The Subject dropdown displays the two teams from the selected matchup. Choose the team of the player you want to focus on. Note: Team-level data is not currently supported—only individual players.
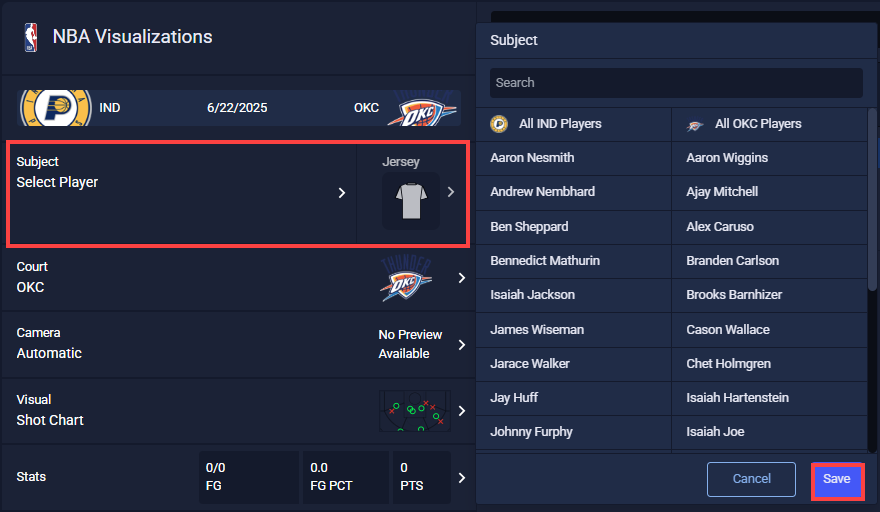
Click Save.
5. Select Your Camera Angle
Select the camera angle of the rendered shot chart video. To do this, click Camera.
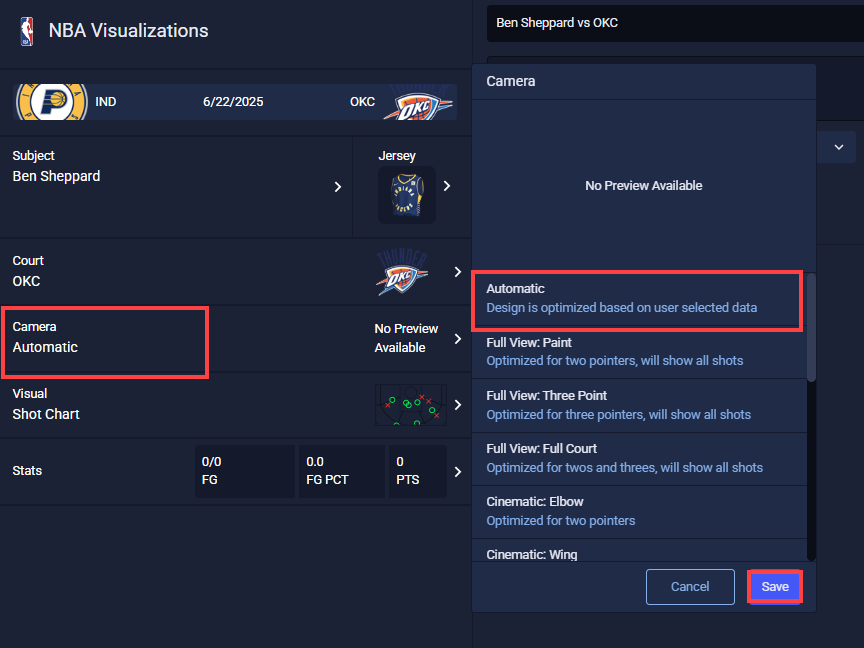
By setting it to Automatic, the camera is tailed tailored to the content you select in steps 7 & 8. Click Save.
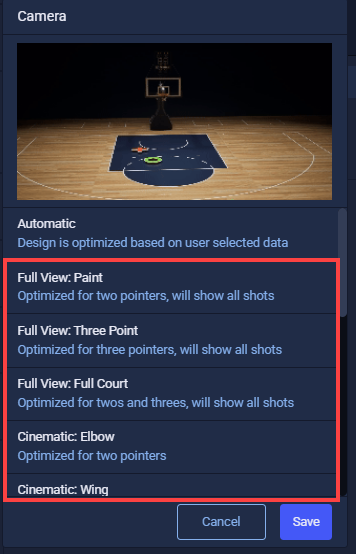
Other options provide a list of available camera angles, each with a short preview to help you choose the best view.
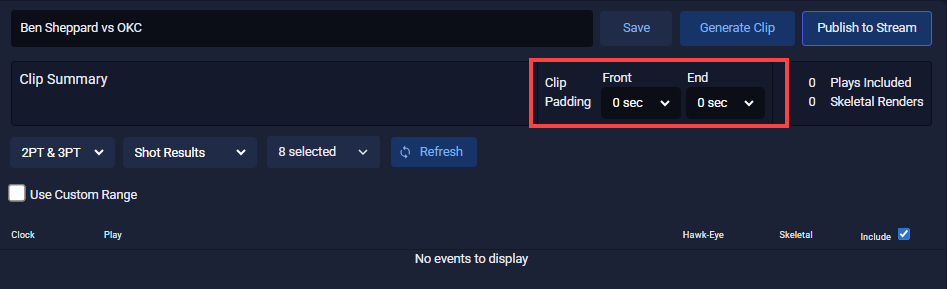
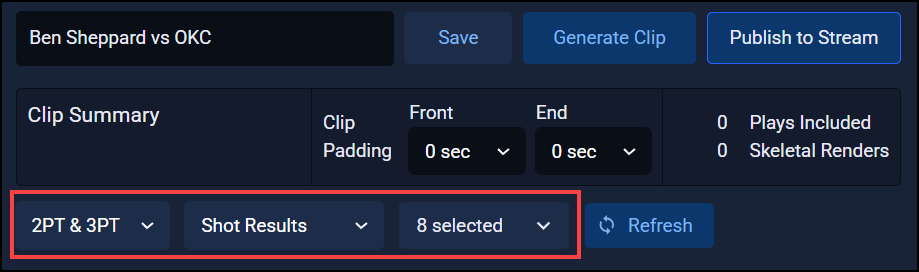
6. (Optional) Set Clip Padding
Clip padding lets you extend the start or end of a clip to include extra context before or after the main action. You can add padding by selecting from the available 5-second intervals in each dropdown in the Clip Summary section.
7. Select the Shots Content
From the Shot Type, Shot Results, and Filters dropdowns, select the content you would like to appear on your Shot Chart.
8. Select the Shot Content
After selecting your content, you’ll see a list of shot events that will be included in your output.
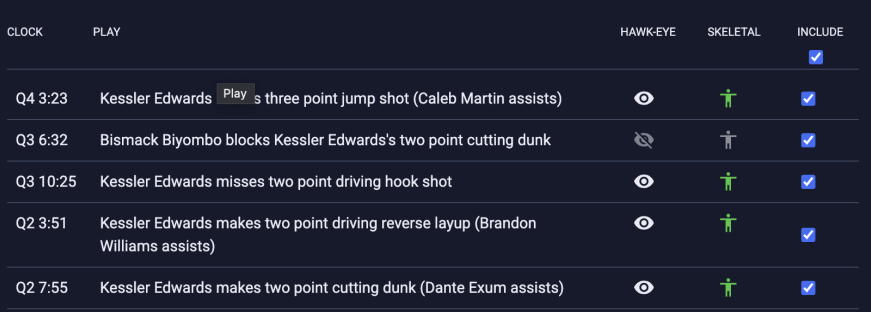
By default, all plays that match your selected criteria will appear in the render, with skeletal tracking turned off.
If you don’t want a particular shot included, simply uncheck it in the Include column.
Shots with valid Hawkeye tracking data will display a white eye icon in the Hawkeye column. Shots that are blocked, goaltended, or have incomplete data will be marked with a grey eye icon with a slash and cannot be used.
To enable skeletal tracking for a shot, click the person icon next to it. Once enabled, the icon will turn green, and the player's shooting motion will be replicated in the render. Note: You are currently limited to selecting up to 5 skeletal tracking events.
9. Customize the Stat Panel (Optional)
Once the player and shot content have been selected, the contents of the Stat Panel can be customized in the following ways:
- Turn the entire panel off/on
- Include only 2PT shots, only 3PT shots, or all FGs (this is the same control as the dropdown in Step 7)
- Turn specific stat category displays off/on
- Adjust the category labels for each stat
- Manually override the stat values for each category
- Adjust the qualifier text
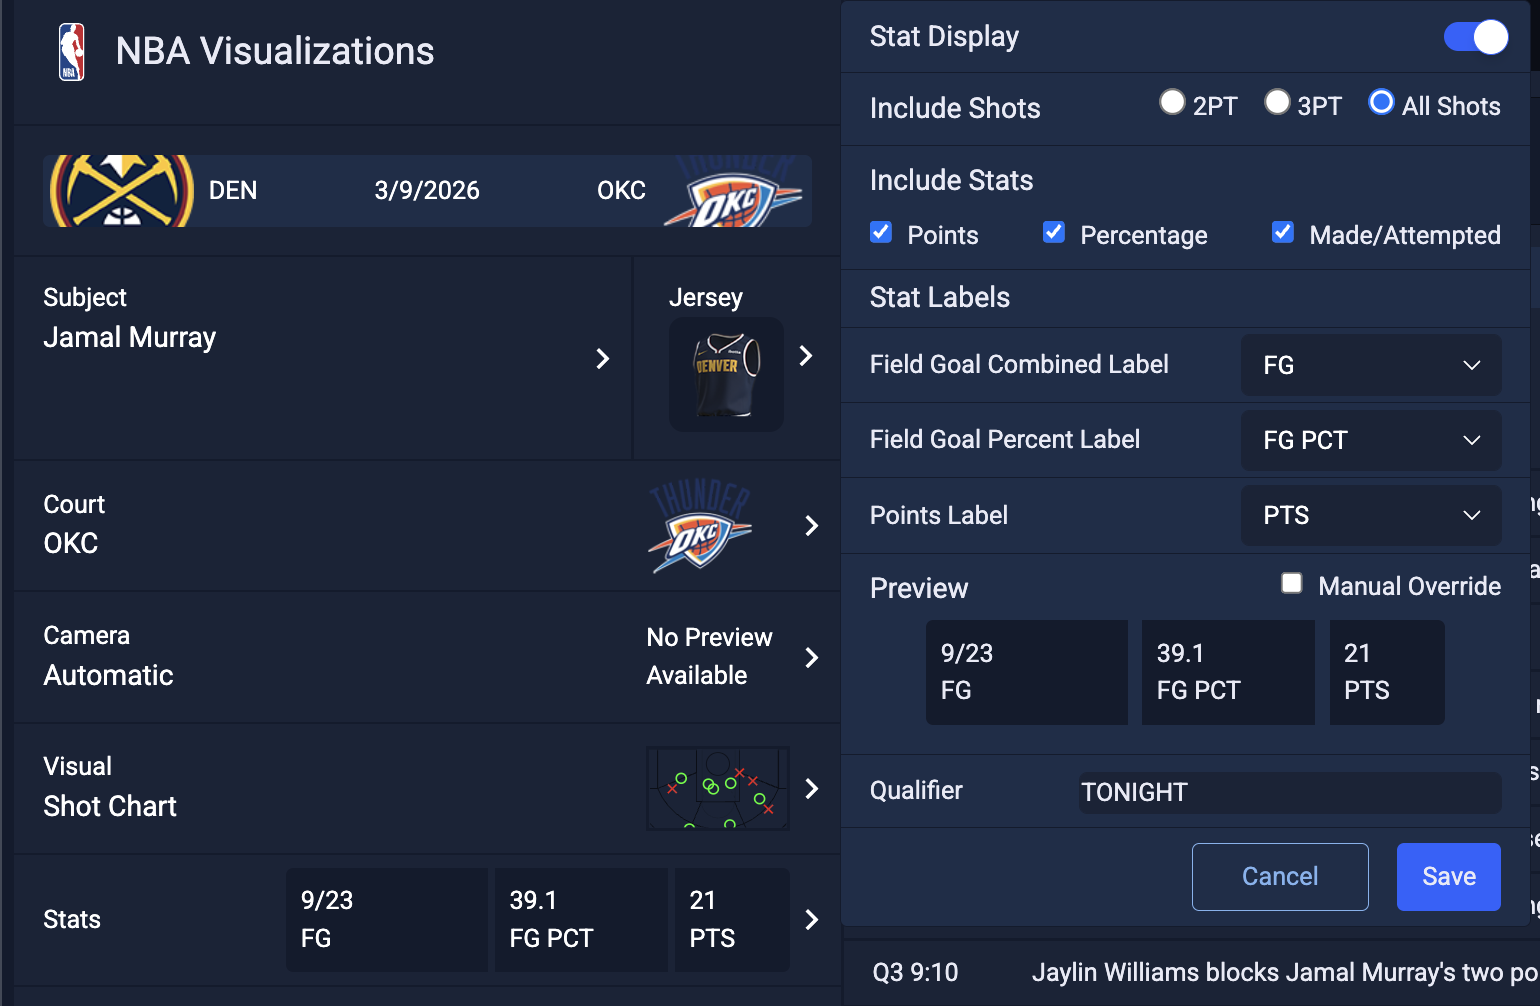
Once you’ve made your desired adjustments, click save at the bottom to lock those changes in.
10. Generate the Clip or Publish to Stream
Once you've selected all your desired settings, give your clip a descriptive name (you can customize this if needed).
Then choose one of the following options:
-
Generate Clip – to download an MP4 version of the clip.
-
Publish to Stream – to send the clip via SRT stream.

**Note:**Rendering typically takes between 45 seconds and 2.5 minutes, depending on the number of events included
After the clip has been processed, you can download it from the Generated Clips panel on the right by clicking the three dots next to the clip name and selecting Download.
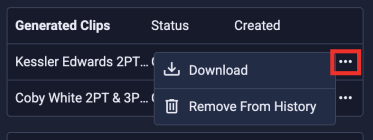
Alternatively, your EVS operator can capture it directly from the stream feed.
Note: The downloaded file name may not match the clip name you entered.
We also recommend clicking Save on your render configuration in case you need to revisit or reuse the setup later.
Note: If you call up a clip you’ve previously saved, be sure to use the attached refresh button to pull in all of the latest events.
11. Review the Clip
We recommend reviewing your rendered clip before taking it to air. While we’re continuously improving how events are displayed, you may occasionally notice a player freezing too early, too late, or appearing off due to falls or awkward movements. If this happens, simply open the saved clip and deselect Skeletal data for the affected event.
Updated 6 days ago