Pull Pages Setup
Setting Up New Pull Page
Naming Your Page
-
Assign a name for the page.

Page Context
-
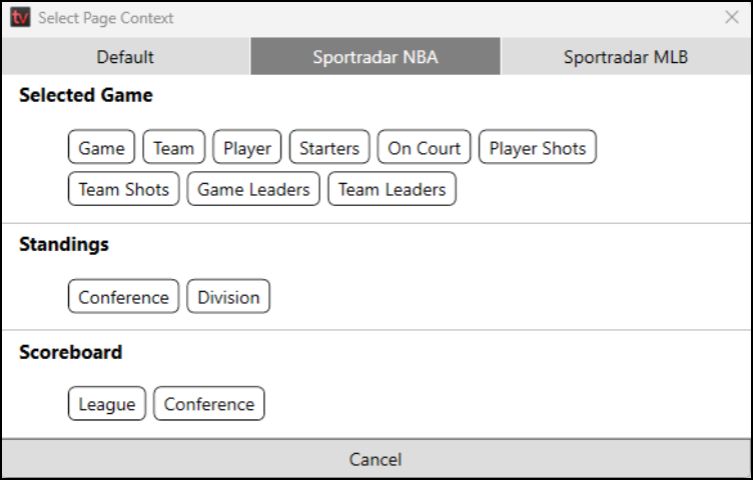
Click on the Context button to select the context that you want from the Sportradar NBA or Sportradar MLB menus.
-
The Context will determine:
-
The type of content you are intending to populate the page with.
-
How many page ranges will be created for this specific page.
-
For example:
- Pages with Player context will create two ranges of 100 pages, one
for the away players and one for home players, to be called up by
jersey number. - Pages with Team context will create two pages, one for the away
team and one for the home team. - Game context can be used for non-team specific elements likes
scoreboards, titlecards, team comparisons, etc.
- Pages with Player context will create two ranges of 100 pages, one
-
The primary data tags that will be available for this page in the Tag Browser

-
Assigning Call-Up Numbers
-
For pages with context that require multiple number assignments, fields will appear for each number.
-
The numbers to the right in parentheses indicate the page ranges that will be created for this page.
-
For Player pages, you can select to always have your preferred team populate in the home range (regardless of home/away in a specific game) by checking the box below.

Adding Tab Fields
-
Click the + Field button in the upper right.

-
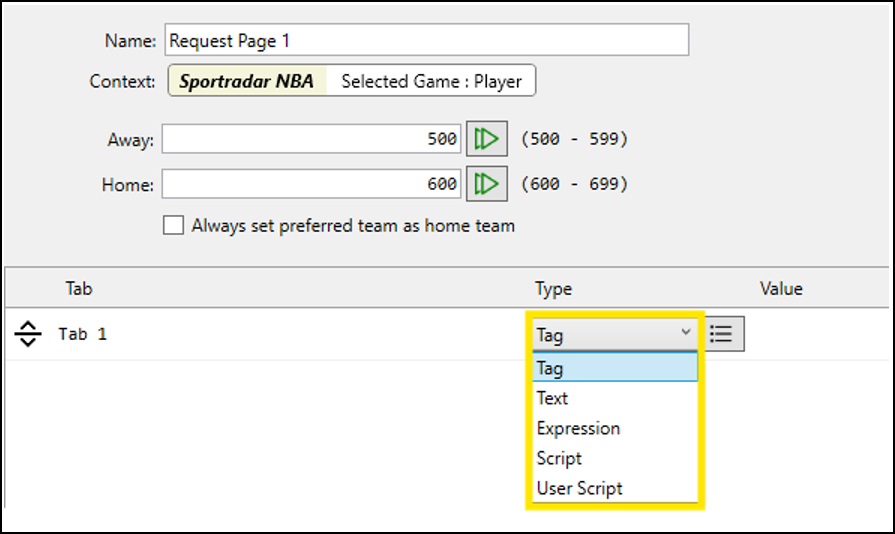
Select type of entry for your tab field.
-
Tag: Pull automated data via SRDI syntax – you can string together multiple tags together in the same field.
-
Text: Custom text – whatever is typed in the field will appear exactly as is on your page.
-
Expression: Write a ‘mini’ script without the use of keys or arguments.
-
Script: Write a custom script that is only available on the individual page.
-
User Script: Utilize a script created in the Scripts tab.
-
-
Selecting data tag for your tab field.
-
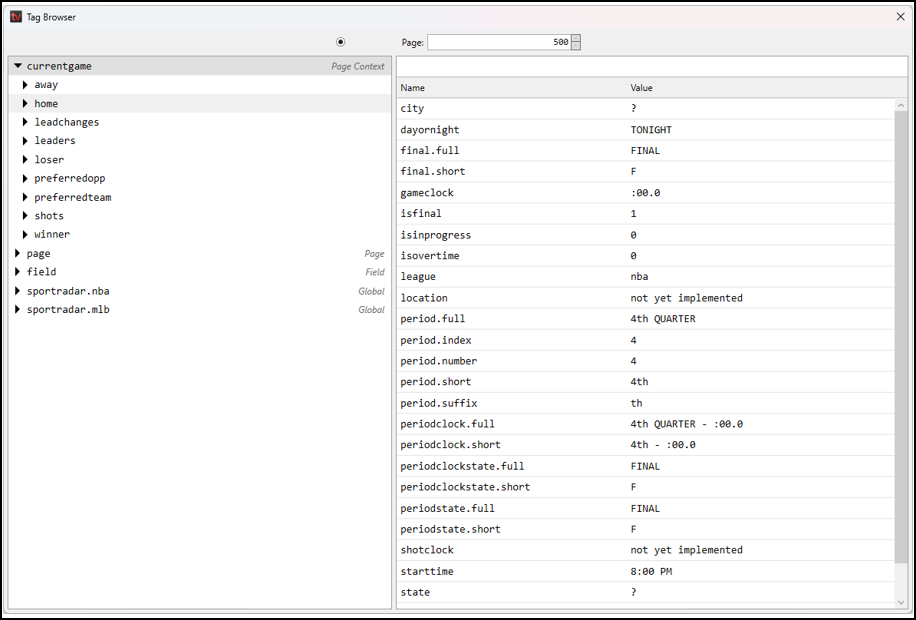
To select a data tag for the tab field, click the button with the 3 bullet points to the right of the tag type.
-
This will open the tag browser, exposing all the data tag options available to add on your page based on the context you have chosen.

-
-
To select a data tag to populate the tab field, double click on the tag on the right side of the tag browser.
-
In the upper right you will see the syntax that will be added to that tab field.
-
This syntax will automatically be added when you double click on the selected tag.

-
Repeat these steps to build out your page.
-
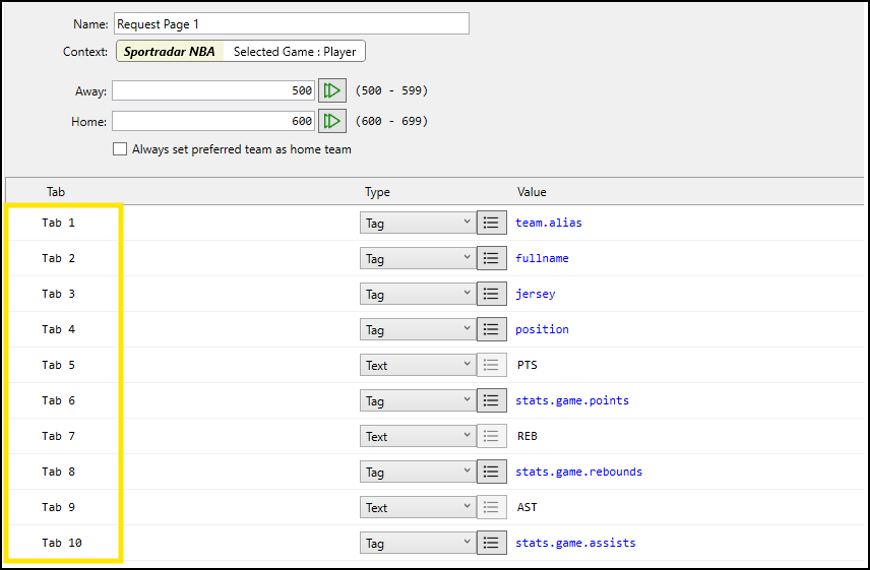
Reminder, the tab fields should be named to match the tab fields in your graphics software.
-
Click HERE and navigate to your specific CG integration.
-
-
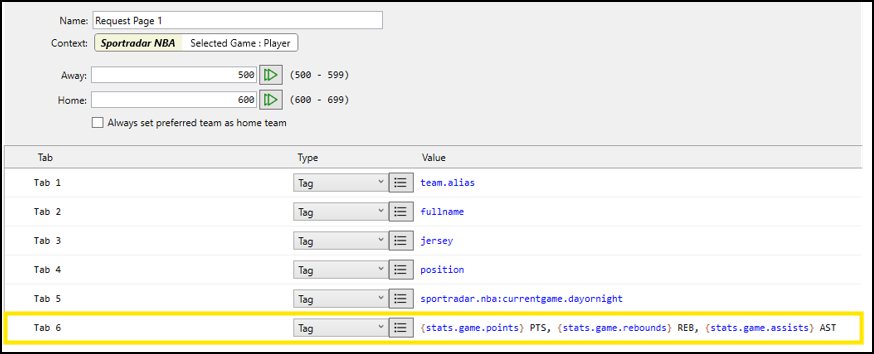
You can combine data tags with plain text in a single tab field by adding braces {} around the data tags.
Testing Your Page
-
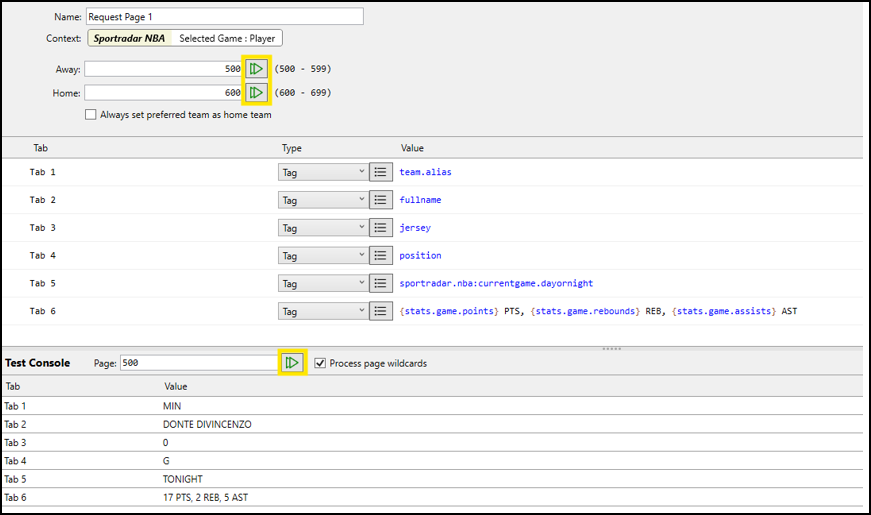
You can test the data tags that are added to your tab fields at any time by clicking the green “play button” to the right of the page numbers at the top of the page.
-
Once the Test Console is up, you can test any page in that range by inputting the page number and clicking the green “play button" in the Test Console.
-
Updated 5 months ago
